Cookie cutter operation guide
1. Template Types in the
App
① Border with
Inner Pattern
No drawing needed—the app provides both the outer border and internal pattern.
This template is mainly for demonstration purposes, helping users understand
how the design translates into a physical mold.
Approximate dimensions
after printing: longest side ~6 cm; border height ~2 cm.
② Border Only
This template offers a variety of standard-shaped borders. It is ideal for
designs that only require a defined outer shape.
Simply draw your
desired pattern within the border area to generate a complete mold.

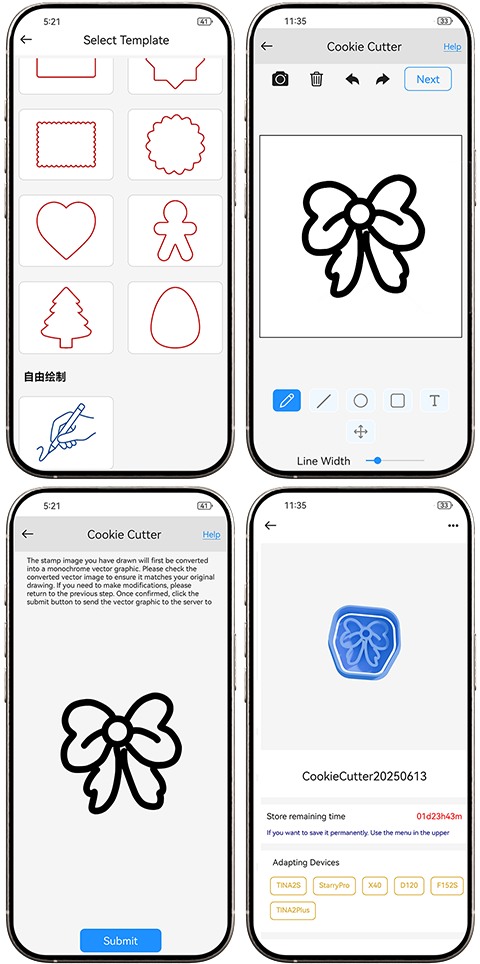
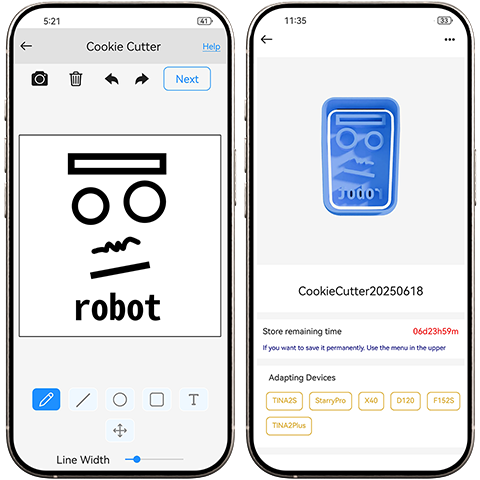
③ Free Drawing
Use this option when a standard border isn’t necessary.
Draw any custom shape
freely, and the system will automatically generate a corresponding mold with an
approximate outer outline.
2. Mold Design Page – Tools
& Functions
① Basic Drawing Tools
Brush, Line, Circle,
Rectangle, Text:
These tools can be freely combined to create custom patterns for your mold.
Perfect for hand-drawn designs.
② Editing Tools
Move, Scale, Delete,
Undo/Redo:
Allows for individual or overall adjustments to your design, making it easy to
revise and optimize.

③ Photo Tool
Tap the
"Photo" tool, upload an image, and click "Next."
The system will automatically convert the image into a mold-compatible outline.
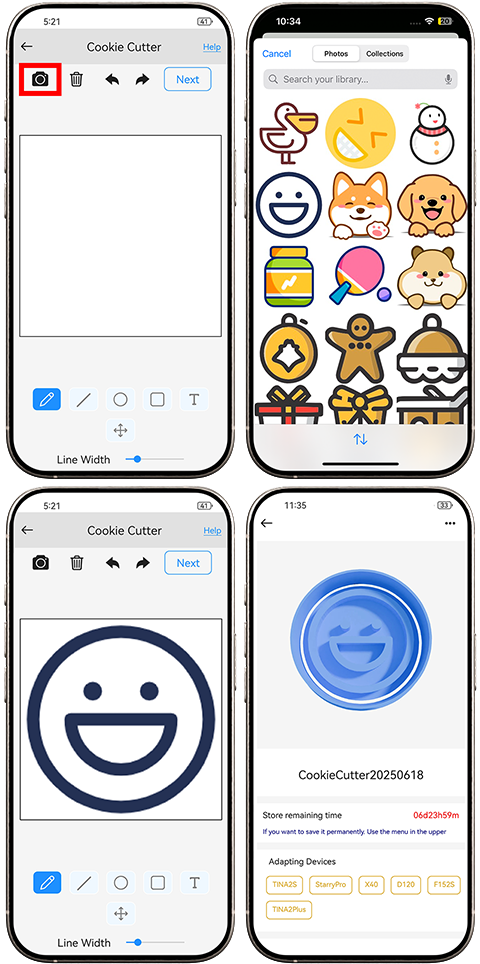
✅Recommended
Image Types:
· Clear, high-contrast
line drawings or vector-style illustrations.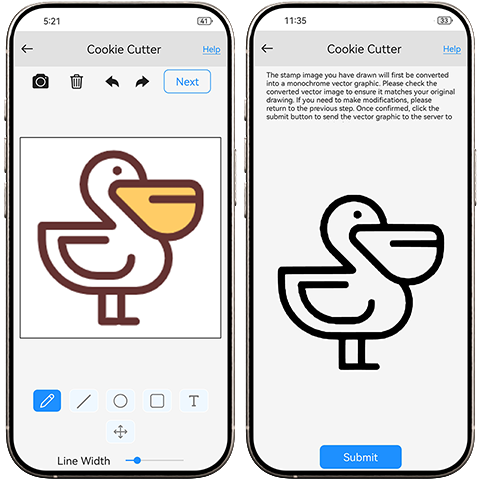
❌Not
Recommended:
· Images with large
color blocks (lines may not be recognized)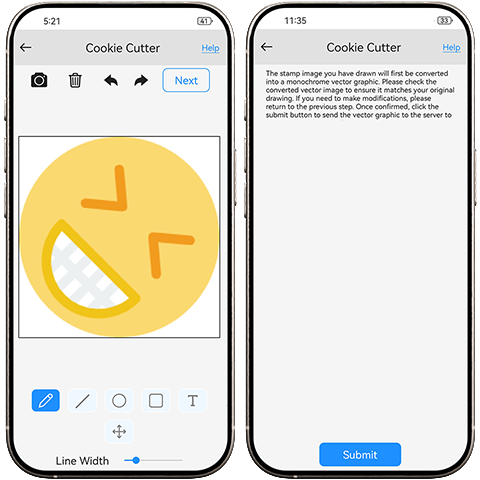
· Complex photographs
(may fail to generate clear results)
· Ultra-thin lines (may
break during printing or remain in the dough)
3. Workflow & Notes
Choose any template type and complete your design
using the drawing tools.
Click “Next” to preview the 3D model, and click “Submit” to automatically
generate the mold.
Size
Limitations:
· For larger or smaller molds, use the Free Drawing mode.
· Maximum supported mold size: 85 mm × 85 mm. Designs
beyond this size will not be generated.
· Standard border templates have fixed dimensions; parts of the design
outside the allowed area may not be included.
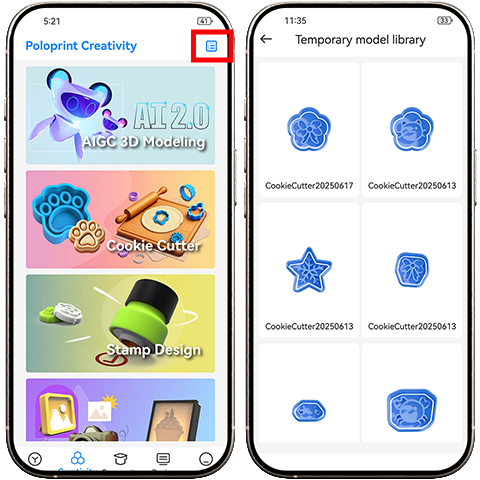
4. Printing Instructions
Open the Temporary
Model Library, find your generated design, and select Print.
estoriginalRemove
Set print parameters according to your printer and filament material.
Recommended
Settings:
· In custom settings, select "No Raft" to
avoid the hassle of removing support layers after printing.
5. How to Use the Mold
①Prepare modeling clay, playdough, or cookie dough. Roll it out
evenly on a flat surface.
②Gently press the inner pattern mold onto the dough
to imprint the design.Light pressure is recommended for easy removal. Pressing
too hard may tear the dough.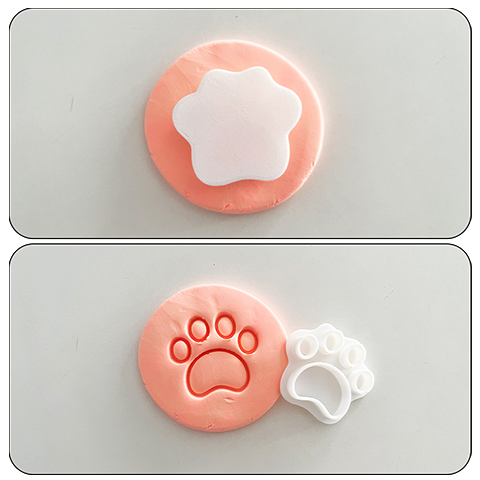
③Align and press the outer border mold to cut out
the full shape cleanly.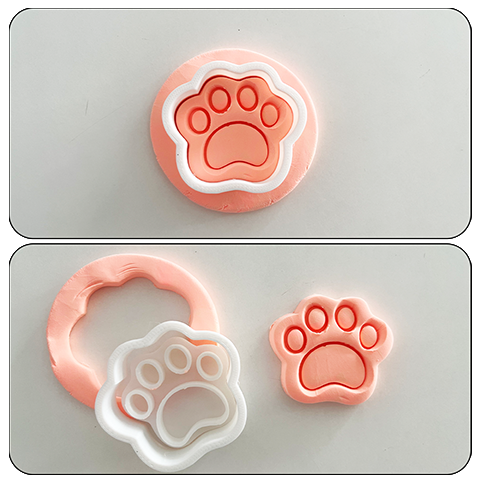
⚠
Important Safety Notes (Please Read Before Use)
This is a 3D-printed
product. It is primarily intended for play materials such as modeling clay,
playdough, and non-edible crafts. It is not recommended for direct food
contact by default.
If you do plan
to use it for food preparation, please follow these safety guidelines
to ensure compliance with food-contact standards:
· Thoroughly
clean before use.
3D-printed surfaces have fine grooves that may trap flour, grease, etc. Use a
soft-bristle brush to clean all crevices to avoid bacterial buildup.
· Avoid stringing,
debris, or fragile features.
Printed parts may have rough edges, small particles, or weak structures.Check
carefully to ensure all surfaces are smooth. If you find sharp fragments or
fragile parts, avoid using them with food.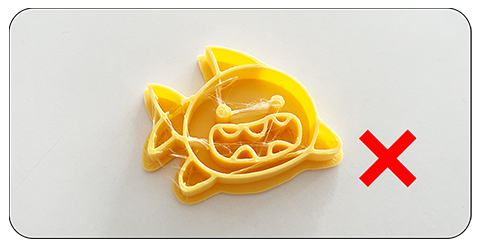
· Do not expose
to high temperatures or hot water sterilization.
Common materials like PLA are not heat-resistant (may deform
above 60°C / 140°F) and may release harmful substances. Even when used with
dough or cookies, avoid high temperatures.
✅ If
intended for food use, follow these additional tips for safer handling:
· Use food-safe
materials.
Look for materials
labeled “Food Safe” or “FDA-approved”, such
as food-grade PLA or food-grade PETG.
· Apply a
food-safe sealing layer.
Use plastic
wrap (cling film) as a barrier during use, or apply a food-safe
silicone coating or epoxy resin to seal the layer lines and reduce
contamination risks.
· Use only for
short-term contact.
Molds should be removed
immediately after shaping to minimize direct contact with food.
For long-term or
repeated food use, it’s safer to use the 3D-printed mold as a prototype to cast
a food-grade silicone mold.
Related Articles
Snowman Operation Guide
Snowman Operation Guide Overview The Snowman Builder allows you to freely combine different appearance modules to quickly generate a printable 3D model, making it easy to create your own unique snowman. 1. Feature Overview A snowman consists of five ...QR Code Operation Guide
1. Page Overview ①Enter QR Code Content In the input box, you can enter any of the following types of content: · Wi-Fi credentials: SSID (network name) and password · Website URLs: Direct users to a specific page (note: some phones may not auto-open ...Herb label operation guide
1. Page Overview ① Five Basic Templates Five different tag shapes are available for selection. You can freely choose the one that suits your needs. ② Add Text Enter your desired text, and the system will automatically generate a corresponding design. ...Linkpot Operation Guide
1. Design the Puzzle In a 7 × 7 dot grid, there are 49 connectable nodes in total. • Tap any dot to start • Slide to an adjacent dot to create a connection – Only adjacent nodes can be connected – Each node can be used only once Each completed ...christmas ornament operation guide
1. Template Types in the App The app includes three built-in Christmas ornament templates: Christmas Ball Santa Hat Christmas Tree You may select any template and freely add personalized content such as names, greetings, simple graphics, or ...